Any Video Converter Ultimate Mac
home

Tutorial

Any Video Converter Ultimate for Mac is an all-in-one video converter, which could convert videos from more than 120 kinds of video formats into compatible formats with different devices. Besides, it is also a DVD converter, DVD creator, and video editor.

1. How to Convert Video/DVD to Other Video Formats?

Step 1

Add Video/ DVD files

Go to the "Convert Videos" panel convert videos. Click on the "Add File(s)" or "Add DVD" button (also through the menu item File -> Add File(s) / DVD or drag files to the list directly from your disc or other location) to select the files you want to import.

Tips: This powerful Video Converter supports all popular video formats including FLV, MPEG1, MPEG2, MP4, 3GP, 3G2, MOV, AVI, M2TS, MPEG TS/TP (for HD Video) etc.
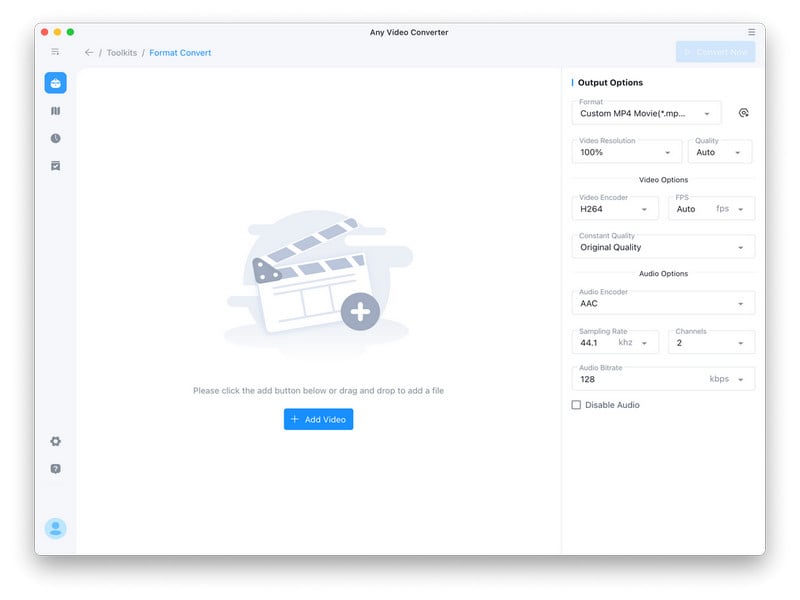
add video
Step 2

Set the Output Profile

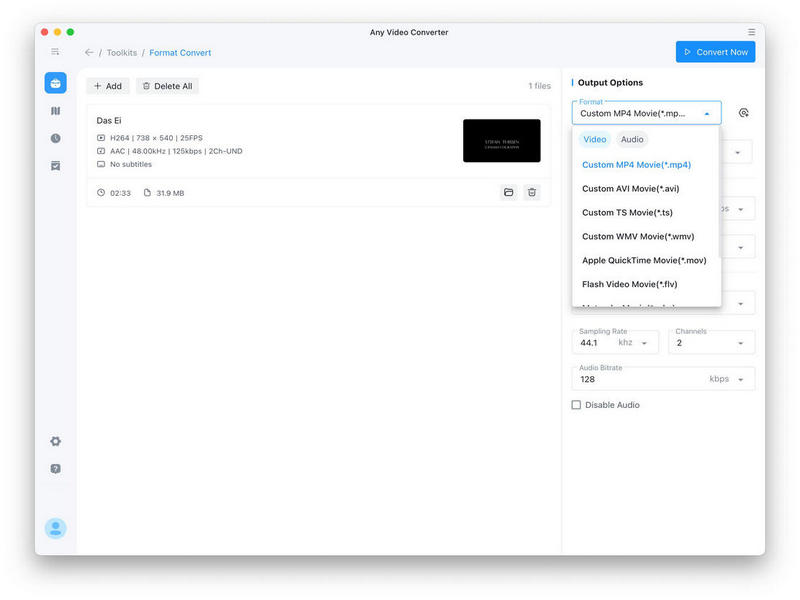
Click the required profile in the Profile drop list on the main interface. After selection, the selected format will be set for all files on the list.

choose the output format
Step 3

Set the Output Destination

Click on the Output Location - Folder drop list and then click Choose… to set the output destination.

Tips: The default path is / Users/ user/ Movies/ Any Video Converter, click Reveal In Finder could open the path.

Step 4

Start the Conversion

Click on the "Convert Now" button and then the list is empty. Meanwhile, all of the files on the list are added to the Convert Now Task- Pending- Converting list starting the conversion in turn and the countdown begins.

start converting video

2. How to Record Video Screen?

Step 1

Select the Record Mode

Go to the "Record Screen" panel to record the screen and select the record mode.

Record Screen: A powerful, easy-to-use screencasting function of this program for the Mac. It allows you to record desktop activities in full screen or region.

Record Device: Allows you to record from the embedded or attached camera to record screen.

record video screen
Step 2

Set the Capture Parameters

Click the "Start Record" button to start and then recording state displays in the Record Screen list. Meanwhile, the recording process is added to the Task - Pending - Recording list.

start recording
Step 3

Stop Recording

Method 1: Click the "Stop Record" button in the Record Screen list to finish recording.

Method 2: Click the "Stop" button in Task - Pending - Recording list to finish recording.

Method 3: If the timer shows options in the menu bar, you can click the options to select.

3. How to Burn Videos DVD?

Step 1

Add Videos

Go to the Burn DVD panel burn DVD. Click on the "Add" button (also through the menu item File -> Add File(s) to burn DVD or drag files to the list directly from your disc or other location) to select the files you want to import.

Step 2

Set Template

Click on the Template drop-list to set a template as a DVD menu for self-made DVD files. The selected template will be displayed in the below window. And then click on the Preview DVD button, the DVD Preview window pops up with added files, next/previous button, and play button.

Tips:

(1) If the Template is "None", it doesn't support to preview DVD.

(2) If no file is added, it also doesn't support to preview DVD.

(3) The next/previous button displays according to the number of the added files.

(4) Click the play button or click the file in the DVD Preview window to play the video.

Burn DVD
Step 3

Adjust Option

DVD Label: The default name is My DVD. Or customize it.

Aspect Ratio: Setting the aspect ratio of the video, such as 4: 3 or 16: 9.

Step 4

Start to Burn DVD

Click the "Burn DVD Now" button and then the progress bar pops up.

Tips: You are unable to operate other functions temporarily, before the completion of burning.

titleHot Products

video enhancer ai
photo enhancer ai

titleHero Products

any video converter ultimate
free video converter

titleHighly Recommended

avclabs video blur ai

AVCLabs Video Blur AI

Video blur and face blur app to blur background, faces or any part of a video.

View Details

titleFAQ

faq