How to Make Your Videos Less Blurry Like a Pro!
In today's visually-driven world, clear video quality plays a crucial role in captivating viewers and effectively conveying your message. However, capturing sharp and crisp videos can be challenging due to various factors. This comprehensive guide aims to provide you with practical techniques to make your videos less blurry, from pre-shooting considerations to post-processing techniques. Additionally, we'll explore the benefits and steps of leveraging advanced technologies such as AVCLabs Video Enhancer AI to enhance video clarity effectively.
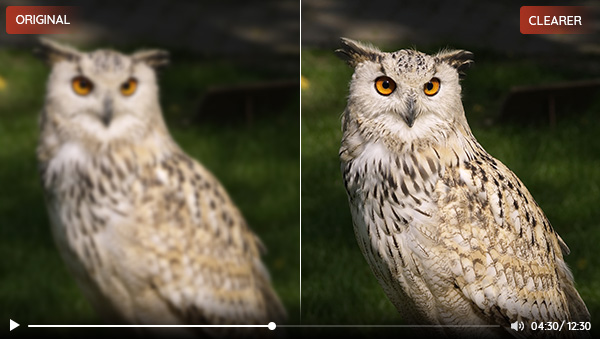
Part 1: Why Do Videos Become Blurry?
Understanding the root causes of video blurriness is crucial to implementing the appropriate solutions. Several factors contribute to blurry videos:
1. Camera Shake or Movement: Unsteady hands or unstable camera setups can lead to shaky footage, resulting in blurred images.
2. Incorrect Focus or Depth of Field: Failing to properly focus the camera or neglecting to adjust the depth of field can result in unclear or blurry subjects.
3. Low Resolution or Compression Issues: Videos recorded at low resolutions or heavily compressed files may exhibit pixelation and overall blurriness.
4. Poor Lighting Conditions: Insufficient or uneven lighting can create grainy or fuzzy videos, reducing clarity.
Part 2: How to Make a Video Less Blurry?
Now that we understand why videos become blurry, let's explore practical techniques and tips to improve video clarity during the capturing and post-processing stages.
1. Pre-Shooting Considerations
Before hitting the record button, it's essential to set the stage for clear video capture. Consider factors like lighting setup, stable camera positioning, and appropriate camera settings to ensure optimal conditions for shooting.Utilizing exposure settings to ensure proper lighting and clarity

2. Tips for Shooting Clear Video
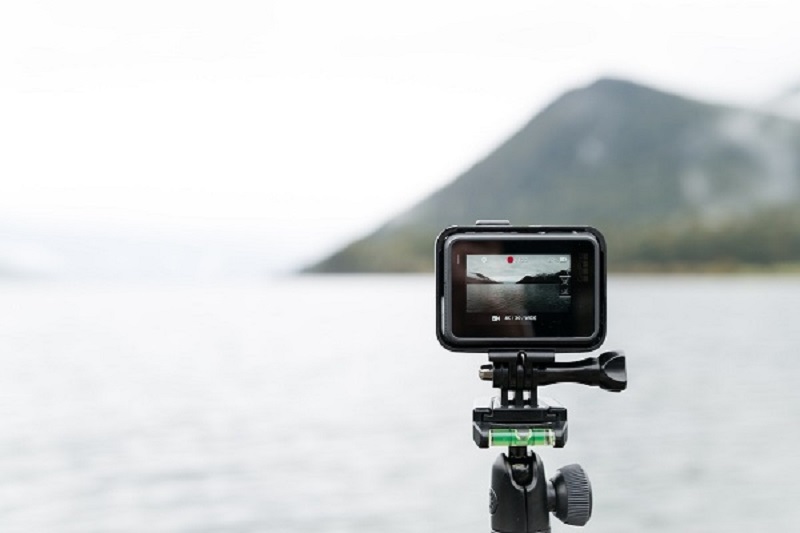
Learn the key practices to improve the clarity of your videos while shooting. Using a tripod or stabilizer helps eliminate camera shake, resulting in smoother and sharper footage. Manual focus adjustment allows precise control over the focal point, ensuring crisp details. Avoiding excessive camera movement and shooting in well-lit environments further contribute to clearer videos. Lastly, selecting appropriate shutter speed and frame rate helps capture motion smoothly.
3. Post-Processing Techniques
Post-processing techniques play a crucial role in improving the quality of blurry videos. After capturing the footage, harness the power of video editing software to refine and enhance the clarity of your videos. Explore adjusting sharpness and clarity, reducing noise and artifacts, and applying filters or enhancements to optimize video quality.
AVCLabs Video Enhancer AI is a cutting-edge tool that utilizes artificial intelligence algorithms to analyze and enhance each frame of a video. By reducing noise, sharpening details, and improving overall image quality, AVCLabs Video Enhancer AI can effectively restore clarity to previously blurry footage. Importing video into the software, selecting the desired enhancement options, adjusting settings, and applying the enhancement process are all simple steps that can produce dramatic results.
AVCLabs Video Enhancer AI
- Fix blurry videos with AI.
- Convert video to 60, 90 and even 120 FPS.
- Upscale videos from SD to HD, HD to 4K.
- Colorize B&W videos to make revive again.
- Support GPU & TensorRT acceleration.
Steps to Make a Video Less Blurry with AVCLabs Video Enhancer AI
Before fixing blurry videos with AVCLabs Video Enhancer AI, it is recommended to check whether your configuration meets the system and hardware requirements for a better experience.
Install AVCLabs Video Enhancer AI and Importing Blurry Videos
Install AVCLabs Video Enhancer AI and launch it. Each user is allowed to fix 3 blurry videos for free.

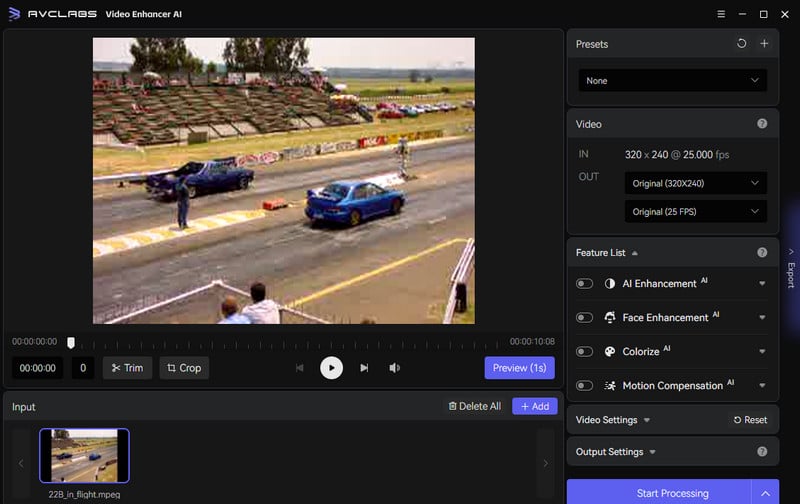
Import the blurry video into AVCLabs Video Enhancer AI by clicking the "Browse" button or dragging and dropping the file into the software interface. Once the video is imported, you can preview it and make adjustments if necessary, such as trimming unwanted portions or applying basic edits.
Select AI Features
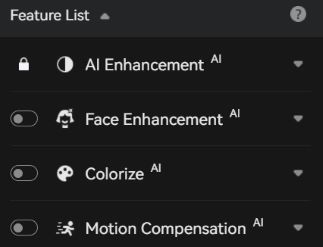
To address various quality concerns, it offers four distinct AI features: AI Enhancement, Face Enhancement, Colorize, and Motion Compensation. When dealing with blurry videos, turn on the AI Enhancement feature is essential. For instances where facial details are blurred, it is advisable to turn on Face Enhancement, as it can effectively restore clarity to blurry images.
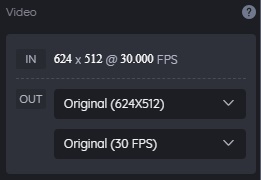
To enhance the resolution of low-resolution recorded videos, simply navigate to the Video-OUT section and adjust the output frame rate and dimensions, ranging from a 200% upscale, SD resolution, to 4K and 8K options.
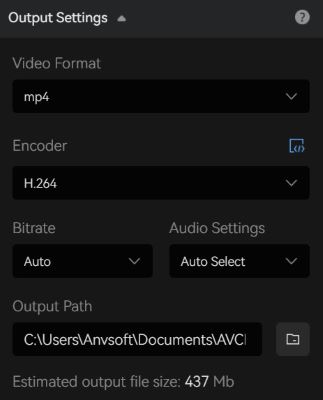
Output Settings
Here you can set the output video format(MKV, MP4, AVI, MOV, WEBM), the encoder (H.264, H.265, VP9 Good, VP9 Best, AV1), bitrate, audio settings, and output path.
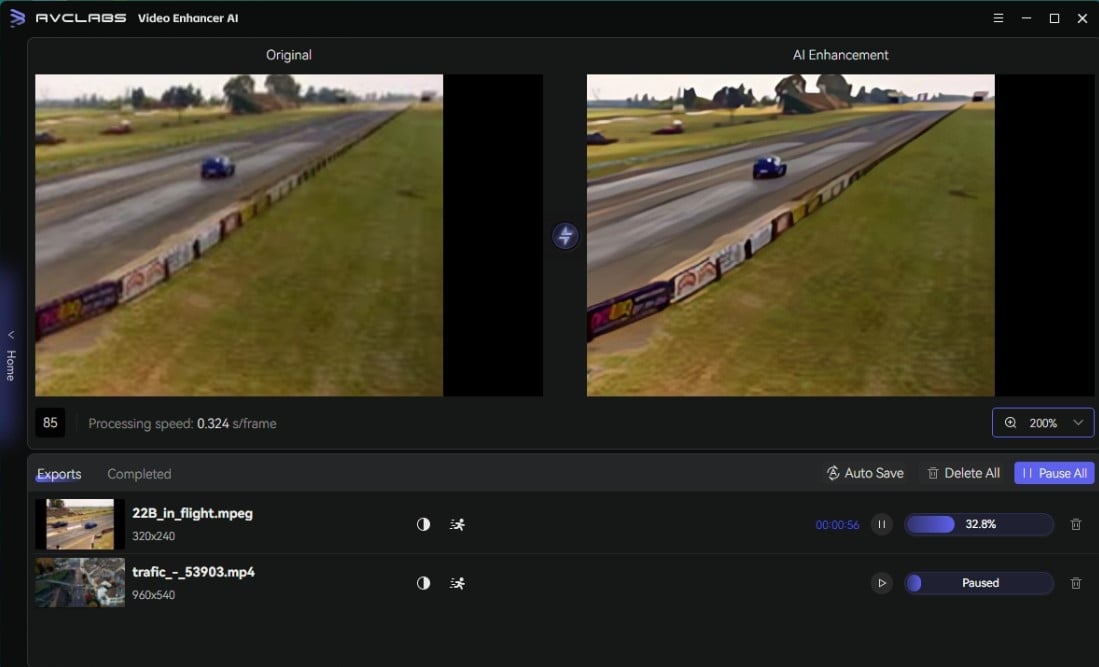
Start Fixing Blurry Videos
After all the settings are completed, just click Export, and you can preview the before and after comparison of the entire blurred video.
Conclusion
In conclusion, by understanding the causes of video blurriness and applying practical techniques, you can significantly improve video clarity. Pre-shooting considerations like stable setups and proper lighting are crucial, while post-processing techniques, including sharpness adjustments and tools like AVCLabs Video Enhancer AI can also enhance video quality.
Elevate your videos by following these steps and provide a captivating visual experience for your audience.
Related Articles & Tips
- • Top 5 Video Clarity Increasers to Improve Video Quality
- • How to Convert Black and White Videos to Color Online [Fast & Free]
- • How to Convert Video to 60FPS for Free in 3 Totally Different Ways
- • 4K Upscaling | Turn Old Videos into Crispy 4K
- • Old Movie Restoration: How to Upscale Old Movies to 4K
- • How Will AI Enhance Surveillance Video Quality
- • How to Restore Old Home Movies to HD
 Video Converter
- MP4 Converters
- MKV to MP4 Converters
- AVI To MP4 Converters
- MOV to MP4 Converter
- Best Free AV1 Converters
- HEVC/H.265 Converter
- H.264 Video Converter
- Android Video Converter
- Samsung Video Converter
- Sony PS4 Video Converter
- Nokia Video Converter
- MPEG Video Converter
- Convert 4K to 1080P
- Convert MP4 to MP3
- Convert M2TS to MP4
- Convert MVI to MP4
- Convert WebM to MP4
- Convert Videos to MP3
- Convert MP4 to 3GP
- Convert M4V to MP4
 DVD Converter
 Video Editor
- Best AI Video Editors
- Free AI Video Generators
- Best AI Slideshow Makers
- Replace Face in Video
- AI Cartoon Video Generators
- Text-to-Video AI Generators
- Best Free Voice Changers
- Text-to-Video AI Generators
- Sites to Download Subtitles
- Add Subtitles to Video
- Free Online Video Compressor
- Convert Your Videos to GIFs
- Blur Video Backgrounds
- Video Editing Apps for YouTube
 Video Enhancer
- Best 10 Video Enhancer
- Improve Video Quality
- Fix Blurry Videos
- Remove Noise from Footage
- Upscale Video from HD to 4K
- Upscale Video from 480P to 1080P
- Best AI Video Upscaling Tools
- Make a Blurry Video Clear
- Best Old Video Restorer
- How to Sharpen Video
- Fix Bad Quality Videos
- Increase Video Resolution
- Convert Videos to 4K
- Upscale Anime Videos to 4K
 Photo Enhancer
- Fix Blurry Pictures Online
- Make Blurrys Picture Clear
- Increase Image Resolution Online
- Remove Blur from Images
- AI Image Sharpener Online
- Topaz Gigapixel AI Alternatives
- Fix Low-resolution Photos
- Colorize Historical Photos
- Remove Noise from Photos
- AI Image Sharpener
- AI Face Retoucher
- AI Image Enlargers
 Mobile & PC


