Movavi Video Editor Review | Best Feature-rich Video Editing Software
"Is Movavi good for video editing? Is Movavi Video Editor worth it?" - Jaime Fowler
In the fast-paced world of content creation, video editing has become an indispensable skill. Aspiring YouTubers, filmmakers, and social media enthusiasts are constantly on the lookout for user-friendly yet powerful editing tools. Movavi Video Editor emerges as a contender in this landscape, offering a range of features designed to cater to both beginners and experienced editors.
In this article, we would like to provide you with a full Movavi Video Editor review. We will explore the features, functionality, ease of use, performance and overall value of Movavi Video Editor.
 Part 1: Overview of Movavi Video Editor
Movavi Video Editor is a user-friendly video editing software designed for individuals who want to create and edit videos without the complexity often associated with professional-grade editing tools. Developed by Movavi, a multimedia software company, Movavi Video Editor provides a range of features that cater to both beginners and more experienced video editors. The software supports various editing functions, such as trimming and merging clips, as well as advanced features like chroma key and motion tracking. Movavi Video Editor is available on different platforms, including desktop and mobile devices, making it accessible to a wide range of users.
 Part 2: Key Features of Movavi Video Editor
Movavi Video Editor offers a wide range of features that make it a powerful and versatile video editing software. Whether you are a beginner or a professional, these features will help you create stunning videos with ease.
Key Features of Movavi Video Editor
1. Intuitive Interface
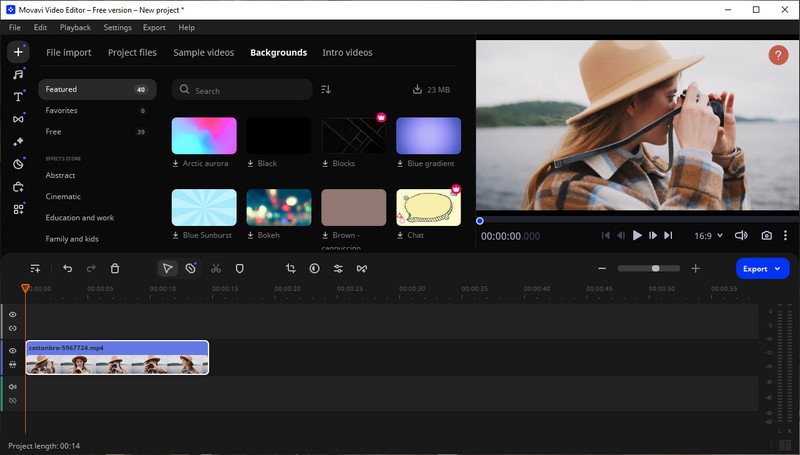
The user-friendly interface of Movavi Video Editor makes it easy for users of all skill levels to navigate and use the software. The main window is divided into four sections: Project media, Timeline, Effects, and Output. This layout allows for efficient organization and editing of videos, photos, and audio files.
2. Wide Variety of Editing Tools
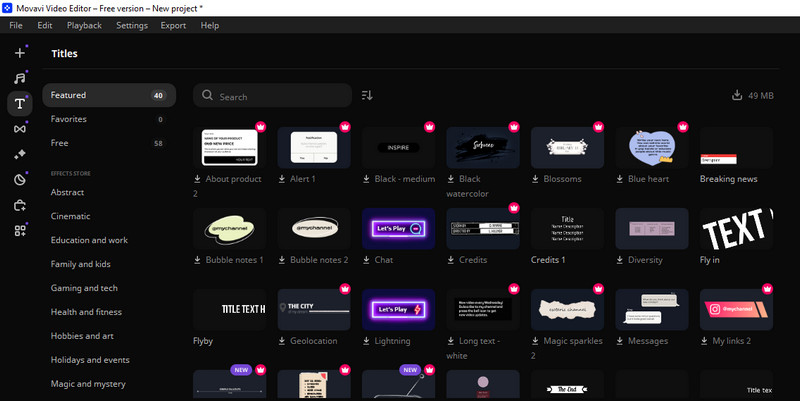
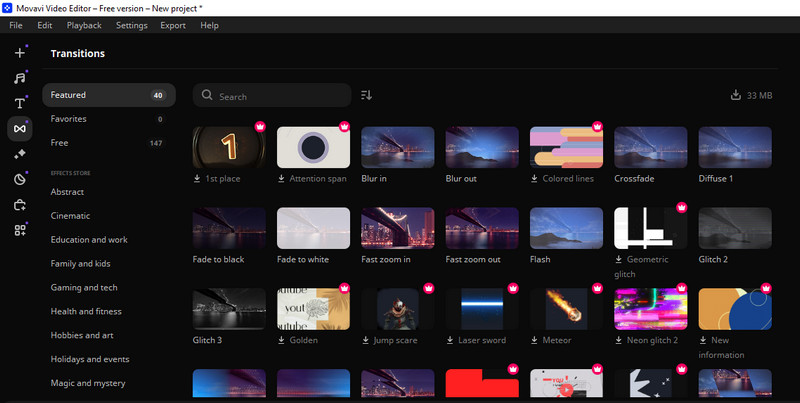
Movavi Video Editor provides a comprehensive set of editing tools that allow users to fine-tune their videos to perfection. These tools include crop, rotate, split, trim, and join, among others. Users can also add titles, captions, and audio tracks, as well as apply effects, filters, and transitions to enhance their videos.
3. Automated and Semi-Automated Features
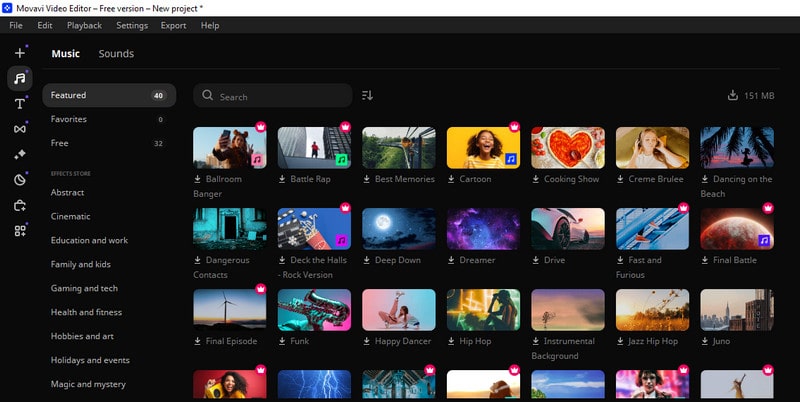
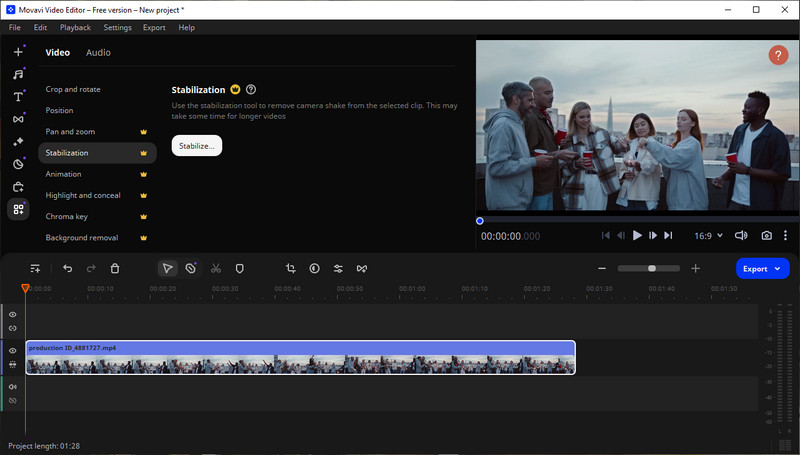
Movavi Video Editor offers both manual control and automated or semi-automated tools to simplify the video creation process. Users can enhance video quality, adjust color balance, stabilize shaky footage, add transitions and text, apply slow motion and speed up effects, add music and sound effects, remove unwanted noise from audio tracks, create split-screen videos, and add captions and subtitles.
4. AI Features
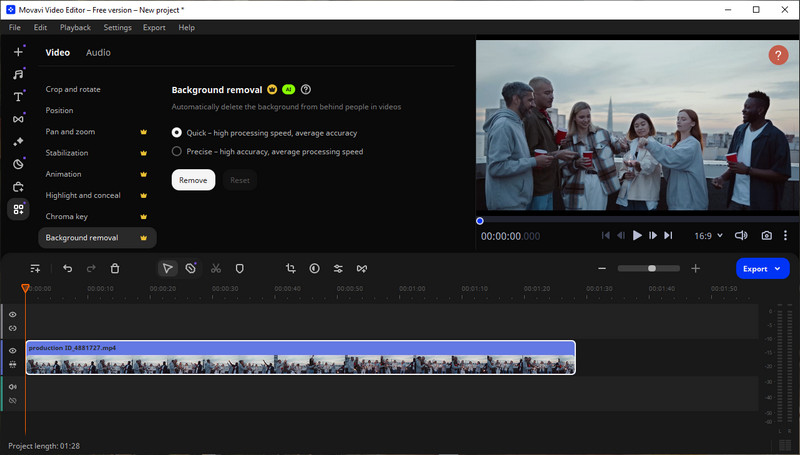
The latest version of Movavi Video Editor incorporates AI enhanced tools that utilize object recognition, facial recognition, motion tracking, and object removal. These features allow for advanced video editing capabilities, such as automatically adjusting video settings to enhance object visibility, removing or replacing backgrounds, separating foreground and background elements, and easily tracking the movement of objects in a video.
5. Advanced Audio Features
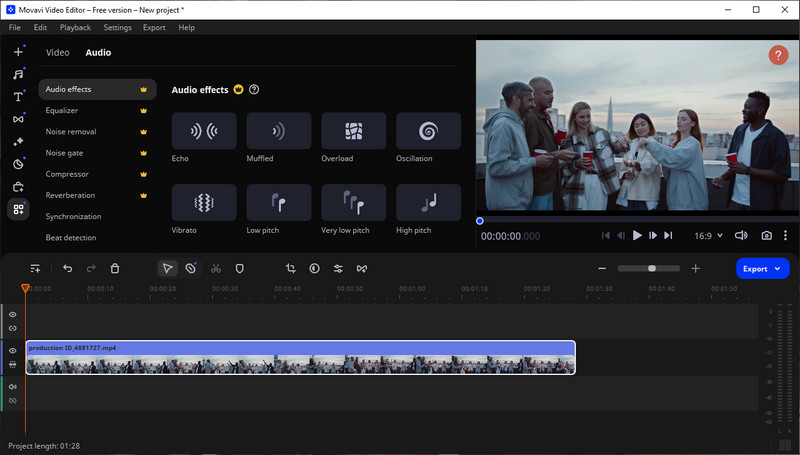
Movavi Video Editor also offers a range of advanced audio features that allow users to create professional-quality audio. The audio equalizer enables users to adjust sound levels and create a desired sound, while the audio mixer allows for mixing and balancing different audio sources. Users can also extend the capabilities of the audio effects module with third-party VST plug-ins.
6. Learning and Support
Movavi provides a wealth of online tutorials and resources to help users learn and master the software quickly. These tutorials offer step-by-step instructions on using the program's features and provide tips and tricks for creating professional-looking videos. Additionally, Movavi offers customer support through email and live chat to assist users with any questions or issues they may encounter.
 Part 3: Pros and Cons of Movavi Video Editor
Let’s check out the pros and cons of Movavi Video Editor.
Pros of Movavi Video Editor
• User-friendly interface:
Movavi Video Editor has an intuitive interface that makes it easy for beginners to navigate and use the software. The layout is clean and organized, allowing users to find and access the editing tools they need quickly.
• Versatile editing tools:
Movavi Video Editor offers a wide range of editing tools, including filters, transitions, titles, stickers, and more. These tools allow users to enhance their videos and add creative elements to make them more engaging.
• Rich media support:
The software supports a variety of media formats, including photos, videos, and audio files. Users can import files from their computer or record directly from a webcam or microphone. Movavi Video Editor also provides a library of built-in content, such as music, sounds, backgrounds, and effects, to enhance video projects.
• Fast rendering:
Movavi Video Editor utilizes hardware acceleration from Intel, NVIDIA, and AMD to ensure fast rendering of videos. This feature allows users to create and export videos quickly, saving time and increasing productivity.
• Export to social media:
Movavi Video Editor allows users to directly upload their videos to popular social media platforms like YouTube, Google Drive, TikTok, and messaging apps. This seamless integration makes it easy to share videos with friends, family, and followers.
• Regular updates:
Movavi is committed to providing regular updates to improve the software's functionality and address any issues or bugs. Users can expect to receive new features, enhancements, and bug fixes to ensure a smooth editing experience.
Cons of Movavi Video Editor
• Limited advanced features:
While Movavi Video Editor offers a wide range of editing tools, it may lack some advanced features found in more professional-grade editing software. Users looking for advanced capabilities such as multi-camera editing or advanced color grading may find the software limiting.
• Watermarked output in trial version:
The trial version of Movavi Video Editor includes a watermark on the exported videos, which can be removed by purchasing a license. This limitation may be a drawback for users who want to test the software extensively before making a purchase.
 Part 4: How to Edit Videos via Movavi Video Editor
Using Movavi Video Editor is a straightforward process, thanks to its user-friendly interface. Here's a step-by-step guide on how to use Movavi Video Editor to edit your videos:
How to Use Movavi Video Editor
Step 1. Download and install Movavi Video Editor from the official website.
Step 2. Open Movavi Video Editor after installation.
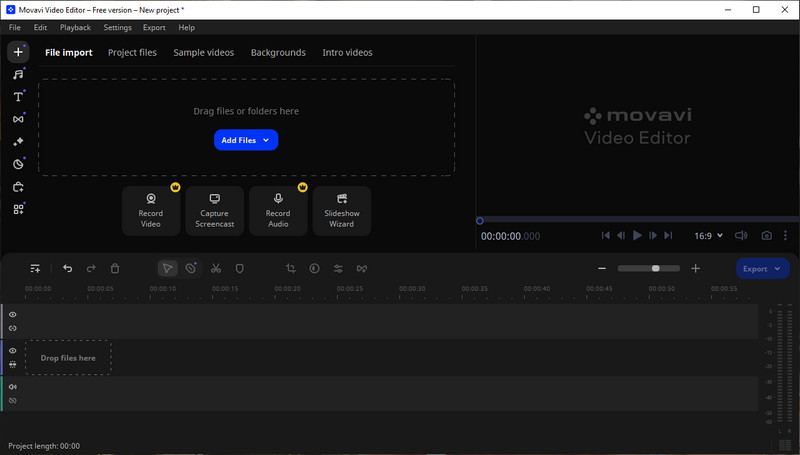
Step 3. Click the Create a project to start a new editing project and choose the aspect ratio for your project (16:9 for widescreen, 4:3 for standard, etc.).
Step 4. Click the Add Media Files button to import the videos, images, and audio you want to use in your project. Drag and drop the files onto the timeline in the order you want them to appear.
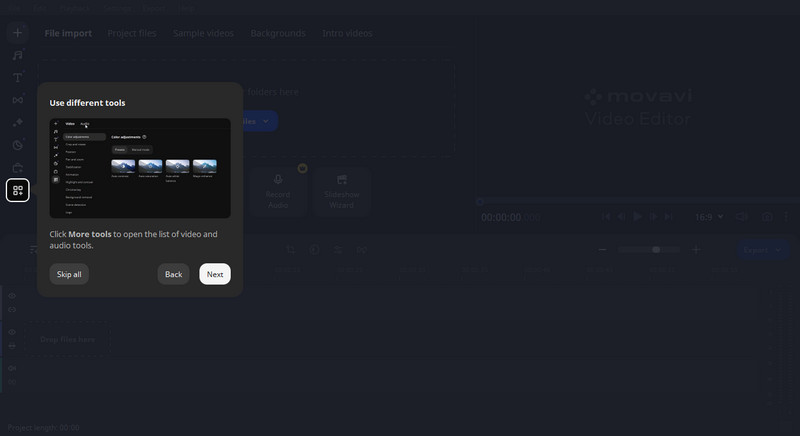
Step 5. Now, select the video editing tools from the left panel of the program to start editing your video.
Step 6. After the video editing process is complete, click the Export button to save the video.
 Recommend: Free Video Editing Software Alternative to Movavi Video Editor - Any Video Converter Free
If you're seeking a free alternative to Movavi Video Editor, Any Video Converter Free is a great choice. It is a versatile video editing software that offers a range of features, including dividing video files into multiple clips, combining multiple media files to create a customized video, eliminating unwanted borders from video frames to highlight specific clips, adjusting brightness, contrast, saturation, and resolution, as well as adding subtitles, watermarks, GIF maker and more.
Features of Any Video Converter
- Add music, subtitles, watermark to a video
- Crop video files to delete unwanted portions
- Split a video into multiple segments
- Merge multiple clips into one video
- Adjust video brightness, contrast, saturation
- Convert videos between any format freely
- Record screen and webcam for further editing
How to Edit Videos Using Any Video Converter Free
Download and Run Any Video Converter Free
Firstly download and install Any Video Converter Free on your computer, and then run the program.

Select the Deaired Tool
To personalize your video, simply choose the specific tool according to your needs.
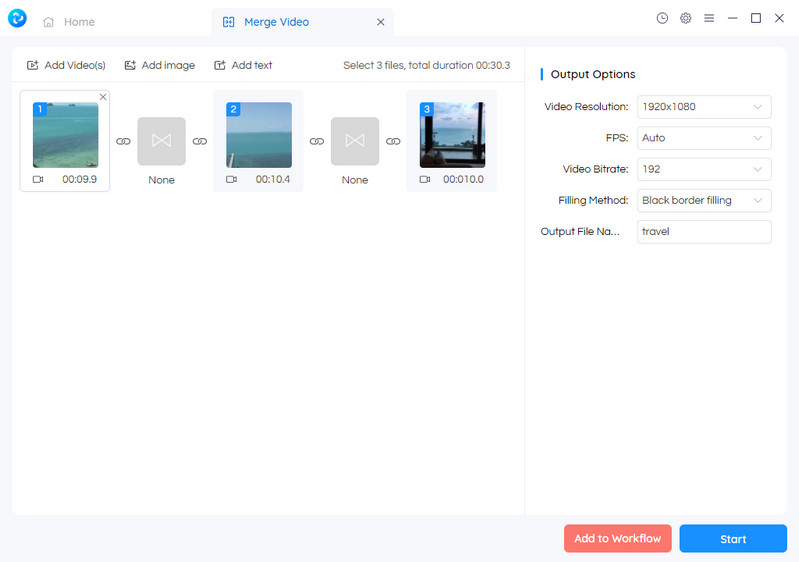
Merge Video: To merge video files, choose the "Merge Video" tool from the Toolkits list, and proceed by adding the necessary video files.
Trim Video: Access the Toolkits list and choose the "Trim Video" tool. Then adjust the slider to designate the desired start and end points of the video clip.
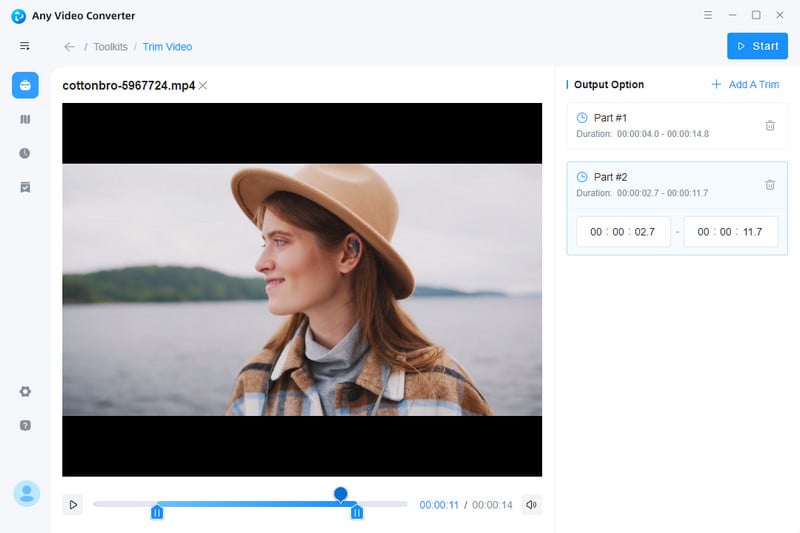
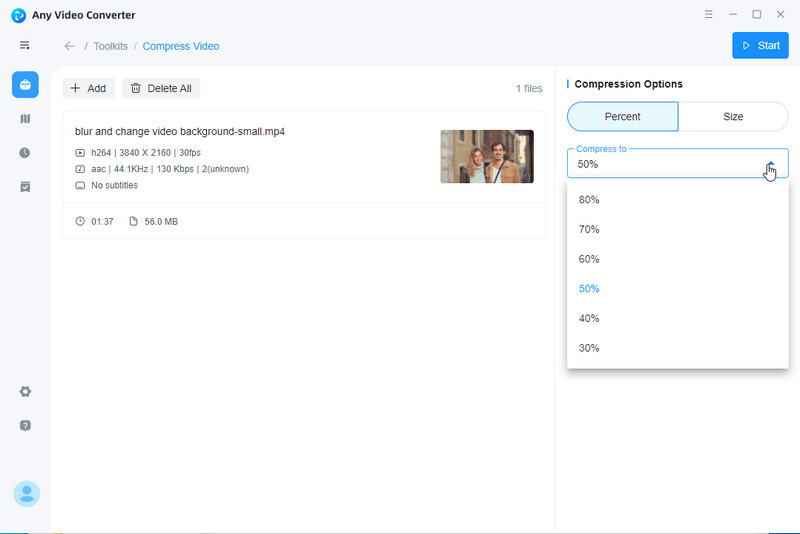
Compress Video: Select the "Compress Video" tool and choose the desired compression percentage.
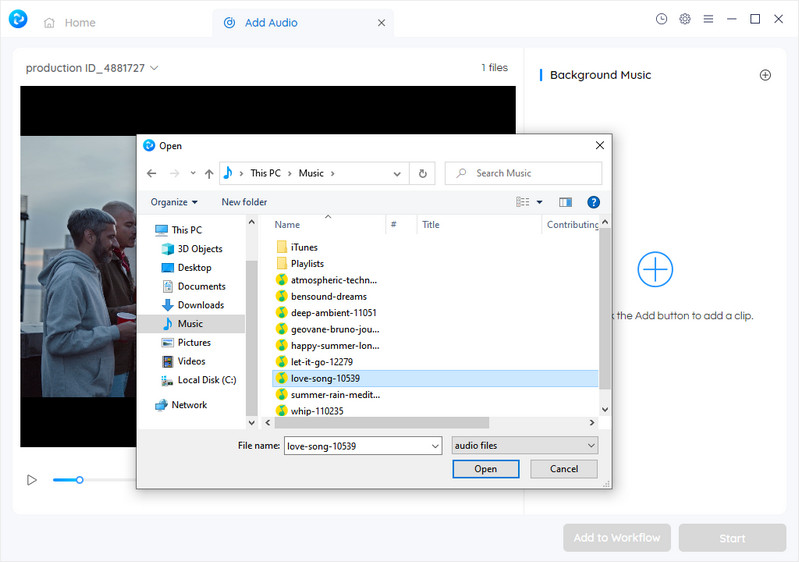
Add Audio to Video: To incorporate music into the video, select the "Add Audio" tool and click on the "+" icon situated underneath the "Background Music" section to include music in the video.
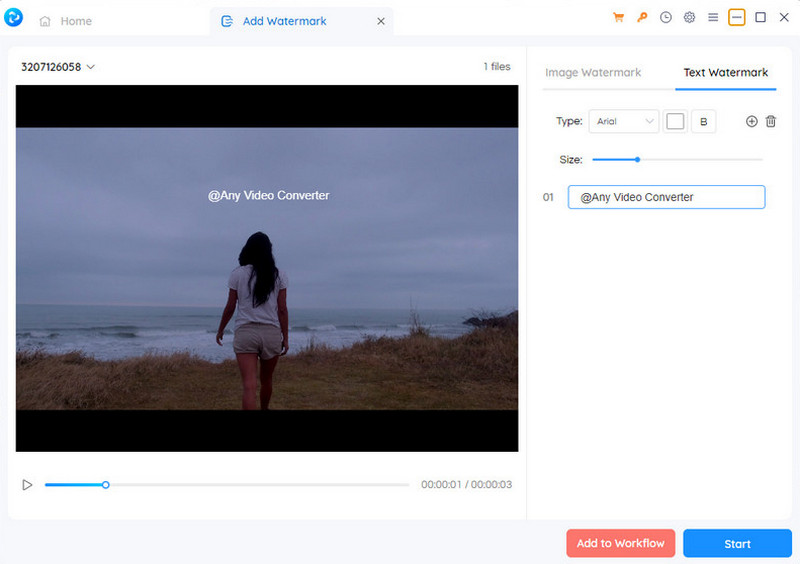
Add Watermark to Video: To include a watermark in the video, navigate to the "Add Watermark" tool and choose either an image or text watermark. Then, personalize the size, color, and placement of the watermark.
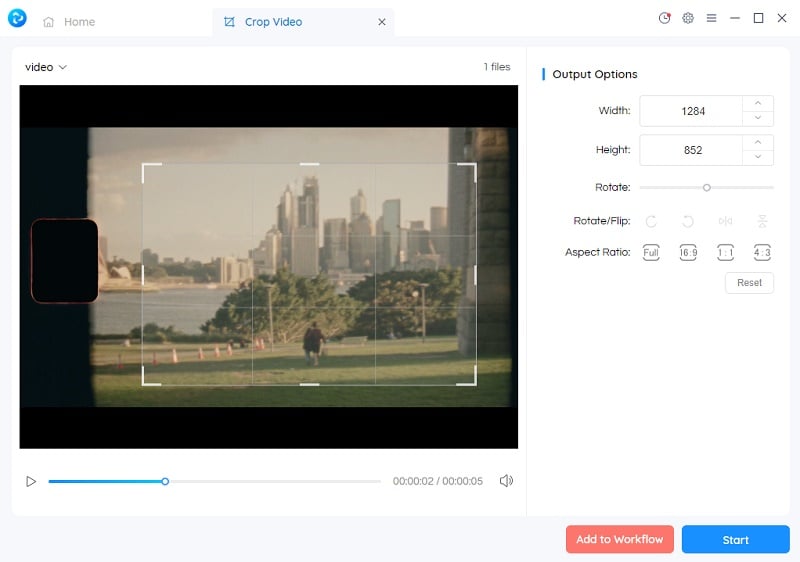
Crop Video: To crop the video, simply find and choose the "Crop Video" tool first. Then, define the desired width and height dimensions by either inputting the values in the output options or manually adjusting the draggable box on the screen.
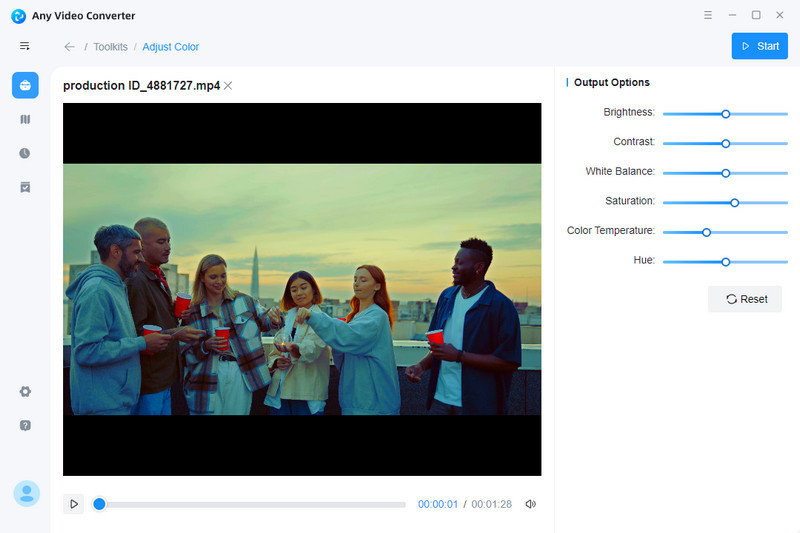
Adjust Color: Utilize the "Adjust Color" tool to modify brightness, saturation, contrast, white balance, color temperature, and hue by adjusting the corresponding sliders.
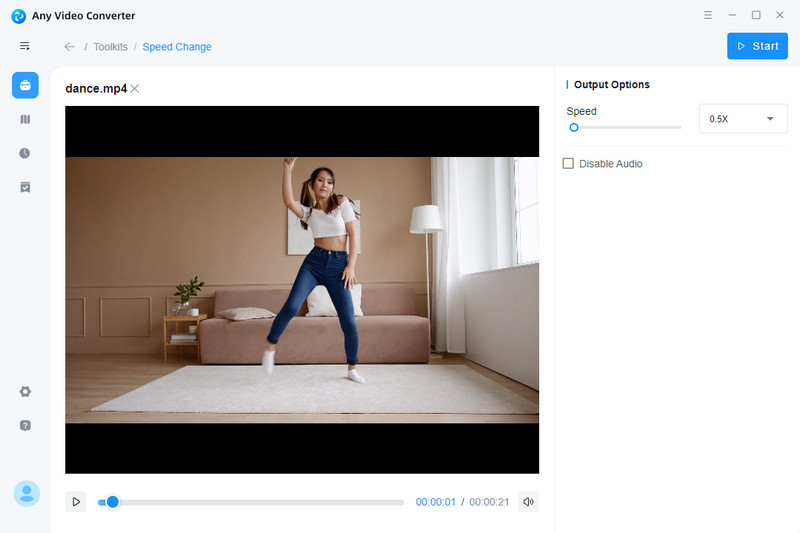
Speed Change: To adjust the speed of playback, navigate to the "Speed Change" tool and select from a range of preset speed settings, such as 2x, 1.5x, or 0.5x.
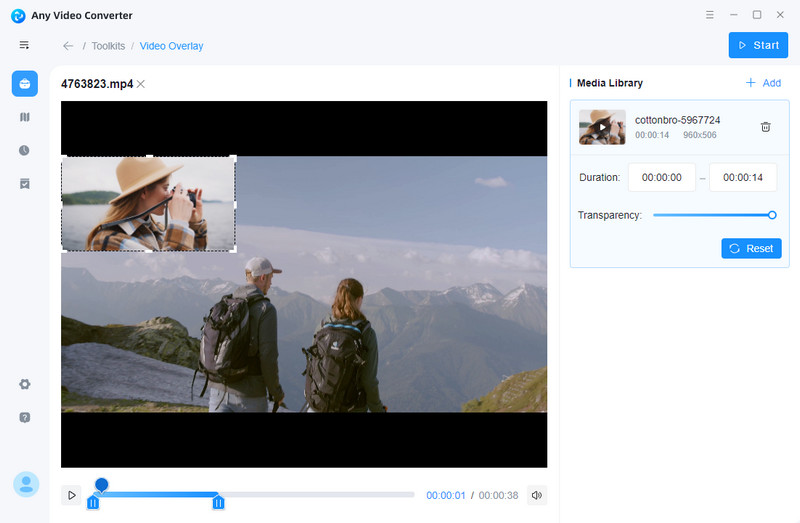
Overlay Video: To access the "Video Overlay" tool, locate it in the Toolkits list and click on it. Import the desired video file into the tool, and then proceed to add the overlay video onto the main video.
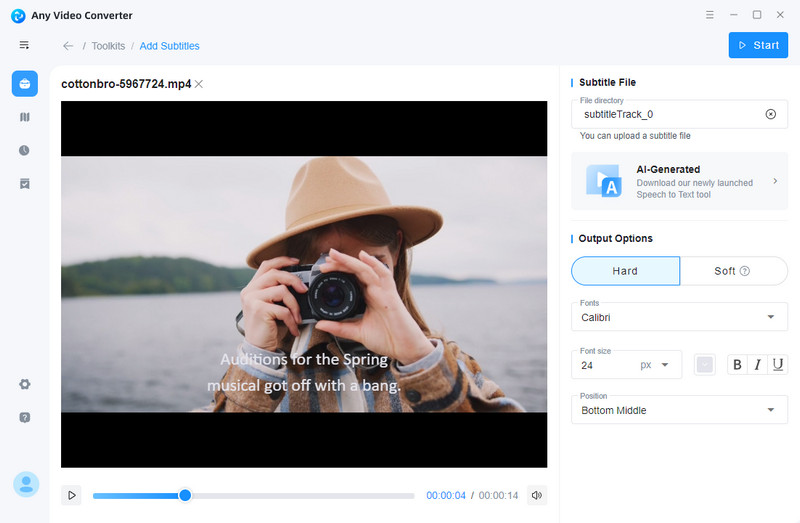
Add Subtitles to Video: Select the "Add Subtitles" tool from the Toolkits list. Locate the "Subtitle File" option on the right panel of the program. Import an SRT file by browsing through your files.
Edit and Save Videos
Once all the necessary preparatory tasks have been completed, simply click on the Start button to initiate the video editing process. The edited videos will be securely stored in the specified output directory.
Conclusion:
Movavi Video Editor is a great choice for those looking for an easy-to-use, powerful video editing tool. Its versatility and ability to help users quickly and easily create stunning videos make it stand out among other similar programs. Despite the few drawbacks of learning the interface and extra cost of purchasing the bundled software, its overall design and functionality certainly outweigh these minor setbacks. With so many features, creating a movie or a sparkling presentation in no time has never been easier. So why wait? Make use of this comprehensive suite today to bring your creative vision to life! And if you're looking for an alternative free program to try instead, Any Video Converter Free is a great option that may fit your needs. Whichever way you choose to go, happy video editing!
Try Any Video Converter to edit your videos with ease!
Related Articles & Tips
- • VideoProc Vlogger Review | Best Free Video Editor for Vlog Videos
- • Video 2x Review: Free and Open Source AI Video Upscaling
- • How to Convert Horizontal Video to Vertical for TikTok, Instagram, YouTube Shorts
- • Video Aspect Ratio Changer | How to Change Video Aspect Ratio
- • Top 6 Best Free Video Editing Software with No Watermark
- • How to Improve TikTok Video Quality
 Video Converter
- MP4 Converters
- MKV to MP4 Converters
- AVI To MP4 Converters
- MOV to MP4 Converter
- Best Free AV1 Converters
- HEVC/H.265 Converter
- H.264 Video Converter
- Android Video Converter
- Samsung Video Converter
- Sony PS4 Video Converter
- Nokia Video Converter
- MPEG Video Converter
- Convert 4K to 1080P
- Convert MP4 to MP3
- Convert M2TS to MP4
- Convert MVI to MP4
- Convert WebM to MP4
- Convert Videos to MP3
- Convert MP4 to 3GP
- Convert M4V to MP4
 DVD Converter
 Video Editor
- Best AI Video Editors
- Free AI Video Generators
- Best AI Slideshow Makers
- Replace Face in Video
- AI Cartoon Video Generators
- Text-to-Video AI Generators
- Best Free Voice Changers
- Text-to-Video AI Generators
- Sites to Download Subtitles
- Add Subtitles to Video
- Free Online Video Compressor
- Convert Your Videos to GIFs
- Blur Video Backgrounds
- Video Editing Apps for YouTube
 Video Enhancer
- Best 10 Video Enhancer
- Improve Video Quality
- Fix Blurry Videos
- Remove Noise from Footage
- Upscale Video from HD to 4K
- Upscale Video from 480P to 1080P
- Best AI Video Upscaling Tools
- Make a Blurry Video Clear
- Best Old Video Restorer
- How to Sharpen Video
- Fix Bad Quality Videos
- Increase Video Resolution
- Convert Videos to 4K
- Upscale Anime Videos to 4K
 Photo Enhancer
- Fix Blurry Pictures Online
- Make Blurrys Picture Clear
- Increase Image Resolution Online
- Remove Blur from Images
- AI Image Sharpener Online
- Topaz Gigapixel AI Alternatives
- Fix Low-resolution Photos
- Colorize Historical Photos
- Remove Noise from Photos
- AI Image Sharpener
- AI Face Retoucher
- AI Image Enlargers
 Mobile & PC


